Showing posts with label tag canvas for Winter holiday. Show all posts

Tuesday, November 20, 2012

Finally!!!!!

Okay I have it done and scheduled and I had all sorts of issues getting a good photo so this is as good as it gets!  The class is on Saturday at 1 pm at Scrap That at 526 Main Street, Norman, OK and will cost $35.  I am repeating this class on Thursday Nov 29 at 6 pm so you can get a start on Saturday and finish up Thursday or book either or class.  I will have the tags cut, embossed and each tag with its individual components will be in a baggie ready for assembly.  Directions are printed out so you will be able to finish it in your own time if you don't get it done on the day of the class.  I think it is an easy peasy Christmas decoration to add to your stash of family memorabilia!  Call 310-3400 and tell Terri to reserve your seat for this class!

The finished Winter Holiday Tag Canvas!


My friend Tauri is holding the canvas for me so that we can show it off.  I love the way all the tags came together on the canvas!  Here are pictures of the dangles at the bottom!  Couldn't get all the bits in focus with the canvas so here are the hanging down parts.  Fun to make too!


The 2012 plaque was cut out using my new labels die from Stampin' Up!  I cut the numbers out on the Cricut and the leaves are a Spellbinders die...  The snowflake rosette is one of the new Tim Holtz dies this season!  Woo Hoo!  I love those cutting things!  Be they dies, punches, or scissors they are nice!  I used eyelets to hold the chain in place!  The bottle cap on the left was crimped by running it through the Big Shot and I left the little one uncrimped.  I next cut a 1" and 1/4" circle out of some Christmas paper I have and glued it in the bottom of the cap and filled them full of Glossy Accents.  The ornament on the right is a small domino that I colored with alcohol ink then let dry.  I cut a rectangular piece of paper out and glued it on the domino with Glossy accents then put a small amount over the top to make it more durable. 

Tuesday, November 13, 2012

and a repeat...three more tags

Today I have three more tags to share with you then I will show you the completed canvas tomorrow...

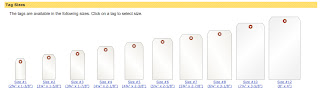
BTW did you know that there are a lot of different tag sizes available precut to purchase?  I didn't but I found a site that sells tags in bulk and they have this graph showing all the different sizes available and all the different weights of tags.  I don't know if I will purchase any since I already have all 3 Tim Holtz tag dies for the #2, #5, and #8 tags and cut them myself most of the time. To check out the graph or purchasing go to xpresstags.com


Here are the tags I am sharing with you today:


Tag 1 is a small #2 size tag that I stamped with a stamp from the Holiday Holidays 3 from Tim Holtz (TH).  It is a Christmas Carol...appropriate I think.  The stamping and distressing was done in Vintage Photo.  The wreath is cut out with TH Movers and Shapers mini wreath and bow dies.   I used the old Martha Stewart branch punch (that I have had forever) to punch a lot of branches then I glued them to the wreath.  The bow is cut from red card stock and I used red Stickles on it and let it dry then covered it with Glossy Accents.  Some red Stickles were dotted around the wreath to simulate berries.   

Tag 2 is a #5 tag that I ran through the TH pine branch embossing folder then inked it with Iced Spruce and distressed it with Vintage Photo.  The pine branches and pine cones are made with the Tattered Pine cone die then I iced them with Lace Stickles and a red bow.  I twisted up a couple pipe cleaners to get a candy cane for the tag canvas.


Tag 3 is a #8 tag that I covered with a piece of Holidays Past seasonal paper from TH!  I then distressed around the edges in Pine Needles and Festive Berries.   The poinsettia is made with the Tattered Poinsettia die and pages from a dictionary that I distressed with the Festive Berries.  The leaves were run through a crimper and distressed with the Vintage Photo.and Noel die was used on glitter card stock.  I finished it up with a velvet brad in the center of the poinsettia.  All card stock used is from Stampin'Up! including that used to make the manila tags.


Monday, November 12, 2012

and three more tags

I decided to share 3 more tags today.  The first two tags are a  lot alike in that they are both 5 1/2" x 2 1/2" and both are embossed with the Tim Holtz (TH) Snow Flurries texture fade that I highlighted the snow flake emboss with the Faded Jeans distress ink and that is where the similarity ends!
 The Tim Holtz Winter Wonder snowman die was used to cut the snowman out and I embossed it with a different snowflake folder after cutting out the 25 with TH Movers and Shapers Mini Reindeer and 25 set.  I backed the 25 with a piece of Seasonal Paper and filled the cut area with Glossy Accents.  The hat and nose were colored with Spectrum Noir markers and a bit of holly bling was glued on.  The scarf is a piece of the seasonal color tinsel from TH Ideology.
 The TH Toy Soldier die was used to cut this soldier out using Stampin' Up! card stock.  Black soot was used to 'highlight' him. 
The third tag today is one of the small 1 5/8" x 3 1/4" tags.  I used Festive berries and Evergreen bough to make the colored back ground then stamped a different background in Archival black from the Holiday Collections stamp set.  I used a bling strip of 'lights', gingerbread girl and boy and tree buttons from my stash to finish up this tag.  

I love making tags.  I don't care what holiday or what reason they are just a lot of fun to create!


Sunday, November 11, 2012

More tags!

Here are a couple more tags that I want to share for the tag canvas!  This is really becoming a lot of fun after losing the original ones that I made last month!!  I hate it when I do something like that...put them up for safety then lose them!!! Urgggghhhhh!!!


This is one of the small 1 5/8" x 3 1/4"tags that I embossed with a holly and berries folder from Sizzix then using Evergreen Bough and then highlighted the tops of the embossing with Pine Needles.   I added a few dots of Christmas Red Stickles for my berries.  The little tag brad is from my stash as is the glittery poinsettia from Michael's dollar bin and I just added a little red Festive Berries to it to make it pop!

This JOY tag was really easy peasy to make but just took a bit of time to get it done.  The tag itself is a #8 tag I cut from a manila folder and embossed with the Tim Holtz Snow Flake die.  The tag was then colored with Faded Jeans, Peeled Paint, and Vintage photo!    The red card stock was first adhered to medium weight chipboard then cut out with the Tim Holtz Ornament die and the Joy Mover and Shapers inset die.  I glued a small piece of Seasonal Stash Paper to the back of the cut out section and then I covered the whole thing with a layer of Glossy Accents and it took forever to dry!   When I do this again I am going to do some random Stickling in contrasting colors before adding a THINNER layer of Glossy Accents to the finish it up.  I think that would make it look more like the old vintage ornaments of my childhood!  To finish the tag up I used a ticket I made from the Odds and Ends stamp set from TH!  I tied a string of tinsel in the tag hole and a string of elastic string around the top of the ornament and called it done!

The third and last tag today is another one of the 1 5/8" x 3 1/4"  and a really easy peasy tag!  Unfortunately it doesn't so up so well on the red background because it is a manila tag edged in the Festive Berries distress ink and then I stamped the Santa collage with Archival Black ink and Tim Holtz stamp that is part of the Holiday Collections stamp set.  I tied a key with red and white bakers twine through the tag hole and added a Christmas muse token to the bottom of the tag.  All done!

I am having fun sharing my tags and I am hoping you are enjoying seeing them. 

Saturday, November 10, 2012

Part of a whole? Tags, tags and more tags...a sneak peek

I thought I would show a couple tags I am making for a tag canvas I am doing for a class at my LSS!  On November 24, 2012 1pm-till done (or too tired to go on) and again on November 29, 2012 6pm-?  I will be holding a class to create this canvas.  Cost is $35 per person and space is limited.  If you would like to take the class call Scrap That in Norman and book a seat.  405-310-3400

The canvas is Winter Holiday/Christmas in theme and is primarily traditional colors of red and green  and is on a 12"x12" canvas.  There are a total of 3-#8 tags, 5-1 5/8" x 3 1/4" tags, 1-#5 tag, and two odd size tags of 5" x 2 1/2".  Below is a diagram of how the tags are laid out.


The first tag I would like to share is a #8 tag I made using the Tim Holtz spritz and flick distress technique.   The first thing I did was emboss the tag with the tall pines texture fade then using a blending tool I colored the ground with Gathered Twigs and Vintage Photo, the sky is a combination of Faded Jeans and Peeled Paint, trunks of trees and around edges is Walnut Stain, and the tree tops are Evergreen Bough.   After letting it dry thoroughly I spritz water on my finger tips and flicked it on the entire tag!  The deer is cut out with a Mover and Shaper Die called Mini Reindeer and an addage tag finishes it up. 


 The second tag is one of the 5- 1 5/8" x 3 1/4" tags.  I embossed the tag with a texture trade Seasonal Stuff.  I then applied Faded Jeans and Festive Berries distress ink and stamped Believe from the Mini Holiday stamp set.  2 snow flake brads finished this small tag up.


I enjoy making tags and I am always looking for ideas to use them in.  I am hoping to be able to find a good way of storing them besides tossing them in a drawer and forgetting about them.  Do you have any good ideas?