I have been making canvas's recently and everyone that has seen them has been after me to get a class together and teach them how to make the canvas's too. Finally I got it together and we are having THE class at WLS on Saturday.
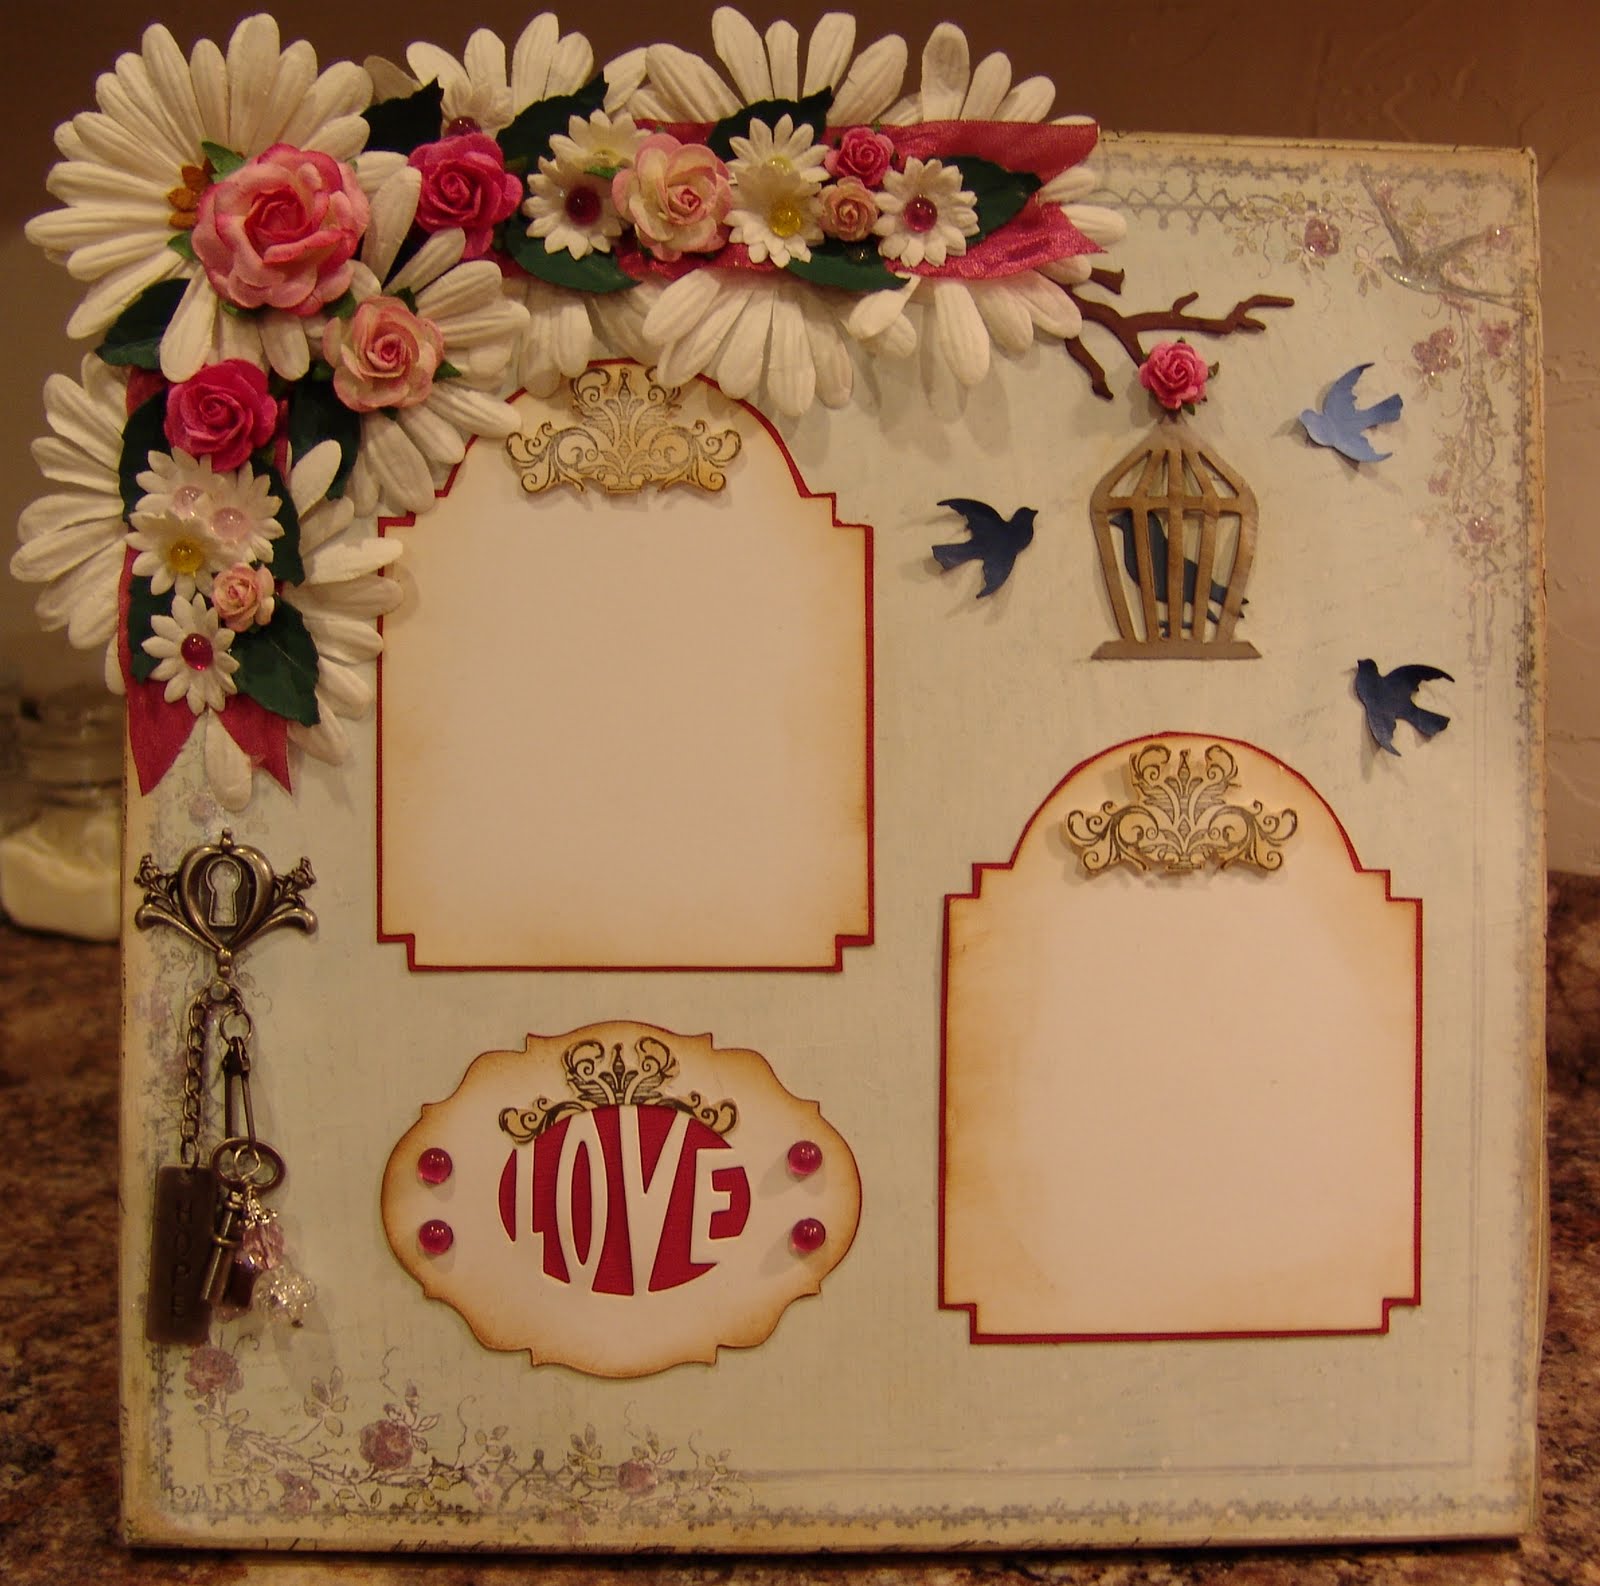
The basis for this project is a 12"x12" stretched canvas by Canvas Corp. but there are all sorts out there that you can use. This one is just plain canvas that hasn't been gessoed but I like the stiffness of the gesso so I mixed some gel medium and gesso together and painted the canvas front and the back of the paper and stuck the paper on the canvas. The printed paper is by Creative Imaginations Iron Orchid Designs and after sticking it on the canvas I put a couple coats of the watered down gel/gesso mixture on top wiping the corners off with a wet wipe before it got to dry so the designs would show through. The picture mats are made with the Vintage Cabinet Card die and a contrasting mat cut around it. The flourish on the top of the mat is from the Urban Chic stamp set from Stampers Anonymous Tim Holtz line. I distressed around the canvas frame and the mats with Vintage Photo Distress ink after applying a layer of tissue tape to the outer edge of the frame.
 The love die and Mini Baroque die were used to make the love emblem. I cut a pink and a white emblem then used the love die to cut out the oval in the white and glued it on top of the pink. I distressed around the emblem with Vintage Photo Distress ink and added the pink half beads and the flourish.

After the canvas was completely dry I took some crepe ribbon and glued it to the upper left corner bunching it up as I went. I used Mulberry roses and 'Color Me Crazy' daisies to create the floral arrangement. The centers of the small daisies are decorated with plastic half beads like Dew Drops. The leaves are cut with the Mover's and Shaper's mini leaf die.

I used the mini-bird cage and bird die to make the cage hanging from the branch on the right upper side of the canvas. The birds flying around are cut from the Martha Stewart bird punch.

I took a swivel clasp and suspended it below the lock faceplate using a brad. On the circle loop end I added a word stick and on the swivel clasp side I put the key and a bead fob that I made from some beads in my stash. I used Distress Stickles, Rock Candy, to give some sparkle to the flowers on the paper around the edges because without it the flowers just faded into the paper. I used Accent Glaze on the bird in the upper right hand corner to make it stand out a little.
Product list:
Tim Holtz dies used: Vintage Cabinet Card and Tattered leaves.
Movers & Shapers mini leaf and branch, mini bird cage, mini baroque die, love die
Tim Holtz/Ranger Distress Ink Pad Vintage Photo
Tim Holtz Ideaology: lock and key, swivel clasp, word sticks
Tim Holtz/Stampers Anonymous Urban Chic
Rock Candy Distress Stickles
Tim Holtz/Tissue tape
Creative Imaginations paper Iron Orchid Designs
Martha Stewart Bird punch
Gesso
Gel Medium
Hi Vickie,
ReplyDeleteB4 I forget, can you add ProMarkers to your straw poll on the right please!
Youve been super busy this week, that canvas is stunning! That Love mat is my fav, its gorgeous!
Keryn x
Wow! Your canvas is just stunning - love the vintage look of it and the flower/ribbon detail is just gorgeous. Thanks for the tutorial on how you made it - I haven't got have the materials, e.g. the dies - but I'm sure I could improvise :) Elizabeth x
ReplyDeleteWow! This is stunning! Came to see your desk but this is sooo much better!!
ReplyDeleteStill no internet so I have resorted to staying in lunchtime so I can play catch up with you lovely ladies. I cannot believe I have not been able to go on blogs since Monday - besides not being able to shop!! Arrrrgh!!
Vickie this is a real stunner, adore that TH die saw it on Magpies post and thought yummy!! - I have run into a brick wall and need to get doing - maybe tomorrow huh! Shaz in Oz.x
ReplyDeleteWow, you did a lot to this canvas, and it paid off; it is really nice. Keep on keepin on!
ReplyDeleteWhat a little work of art that canvas is - bet it took ages!
ReplyDeleteA beautiful work of art. A masterpiece in colour. Just love it. Your tutorial for making it is very clear too. Thanks for sharing with us. Hugs Mrs A.
ReplyDeletethis is a really beautiful project. Nicely done
ReplyDeleteThat is absolutely smashingly gorgeous! Love how you have thought out each little bit of the layout to bring it all together to this final beautiful canvas.
ReplyDeleteGood luck for tomorrow, I am positive everyone will be delighted with what they are about to make when they see this sample.
I love those little details: the birdcage, the grouped flowers ... stunning.
ReplyDeleteOh WOW this is fabulous I love it fabulous work of art. :)
ReplyDeleteThats just awesome!
ReplyDeleteI'm new here so I'm going to check out your blog....
Wow, Vickie, that's totally amazing! I've never seen anything done like that before - I love the idea of "altering" a stretched canvas.
ReplyDeleteDid you find the distress ink "took" OK on the gesso mixture? I've always found that gesso acts as a resist to distress inks.
If this is the kind of thing you are producing at the moment I'm not a bit surprised people are clamouring for a class. It's truly excellent.
Many thanks for the blog love on my blog! Much appreciated.
I've never mixed gesso and gel medium before- i should try that and see the effect! Thanks for the tip! I like all the details on your canvas!
ReplyDeleteHello, I am finally able to comment again, LOVE your latest projects!!
ReplyDeleteKeep smiling and creating
What a work space....wow. Great idea the curtain rod ribbon holder...That's an ahh ha moment for sure! Beautiful layout. Love the flowers and the lock and key....great touch.
ReplyDelete